Home
/ How To Make A Wind Vane Step By Step : When autocomplete results are available use up and down arrows to review and enter to select.
How To Make A Wind Vane Step By Step : When autocomplete results are available use up and down arrows to review and enter to select.
How To Make A Wind Vane Step By Step : When autocomplete results are available use up and down arrows to review and enter to select.. Help your child find north, south, east, and west on a real compass, and line up the wind vane accordingly. From that point, every 1″ make a mark tall the way across. Sketch a triangle on the container lid with a marker and cut the paper piece out. Take any styrofoam or paper cup and poke a hole at the center in such a way that the straw can easily be inserted. The arrow will point to where it's coming from.
Make each slit about 1 cm (or 1/2 inch) long. This makeshift wind vane came to be known as a telltale and is still used today by sailors. When autocomplete results are available use up and down arrows to review and enter to select. Exklusive vorteile, tolle geschenke & top angebote! Sketch a triangle on the container lid with a marker and cut the paper piece out.
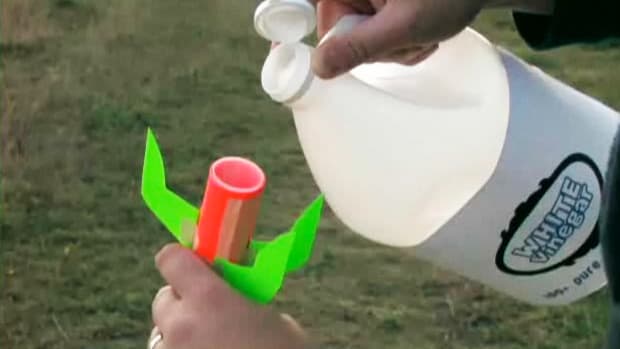
How To Make A Wind Vane from englishmestregibert.weebly.com Make sure there is enough room between the eraser, straw, and pinhead to allow for the straw to spin on the axis. Step 2 sketch a trapezoid with the shortest side being 3 inches and the longest 5 inches for the tail of the arrow. Use a modelling clay to hold a straw in vertical position as shown in the image. Touch device users, explore by touch or with swipe gestures. Make a simple wind vane, and you'll soon be able to amaze others with your ability to forecast weather. Cut out cardboard/construction paper into 1 triangle and 1 square (see video for size). The use of animal characters usually had a connection to religious beliefs. Let's walk you through the simple steps for how build a weather vane.
Now it is the turn of the letters for the wind direction.
Stick the pin into the eraser of the pencil. Repeat this step with the other cup and attached straw. If you live near the ocean, the wind coming from the sea will increase the humidity. An anemometer can be built using plastic cups.attach the cups to a pipe that is connected to the slip ring and plastic ring. From that point, every 1″ make a mark tall the way across. Some wind vanes have directions marked on the rod of the vane, which helps the interpreter determine the direction from which the wind is blowing. Take a pin and make hole inside the paper roll from centre. Step 2 sketch a trapezoid with the shortest side being 3 inches and the longest 5 inches for the tail of the arrow. Use a jig or coping saw to cut out the shape, and sand the edges smooth. Then sand the entire edge of the figure a little with sandpaper. This fun activity makes a great science fai. Put the pin inside the eraser. Use a modelling clay to hold a straw in vertical position as shown in the image.
Take any styrofoam or paper cup and poke a hole at the center in such a way that the straw can easily be inserted. Blades must all tilt the same direction. If desired, draw a compass rose onto your cardstock. An anemometer can be built using plastic cups.attach the cups to a pipe that is connected to the slip ring and plastic ring. Make a simple wind vane, and you'll soon be able to amaze others with your ability to forecast weather.
Https Encrypted Tbn0 Gstatic Com Images Q Tbn And9gcsmnorncoudxyvyucg8681kffimeyyhvdazzoqiip 129xjg8xf Usqp Cau from Then sand the entire edge of the figure a little with sandpaper. Hello friendsthis is the xtreme productions and today i am going to show you how to make a simple diy wind vane by which you can know the direction of wind.hope you like this tutioral. From that point, every 1″ make a mark tall the way across. Test it out and make adjustments as needed until the wind vane spins easily. For this diy project, you only need scrap materials and your usual tools such as a power drill, a box cutter, and a pop riveter. Add tip ask question comment download. If you live near the ocean, the wind coming from the sea will increase the humidity. Aside from depictions of various gods, animal themes are common for wind vanes, even today.
1, take a cardboard piece as base and glue a sheet of paper.
Put the pin inside the eraser. This makeshift wind vane came to be known as a telltale and is still used today by sailors. Take a pin and make hole inside the paper roll from centre. Fold the ½ inch of straw on the inside of the cup, and tape it down to the cup's inner wall. Cut a slight triangular shape into the end to make the arrow tail. The use of animal characters usually had a connection to religious beliefs. From that point, every 1″ make a mark tall the way across. Blades must all tilt the same direction. Insert a pin in the middle of the straw and to the right end of the skewer. For this diy project, you only need scrap materials and your usual tools such as a power drill, a box cutter, and a pop riveter. Next, place your ruler perpendicular to the line at the halfway mark and trace a 5 cm (2.0 in) line to make an upside down t. Measure in 1/2″ and make a mark with a pencil or pen. This fun activity makes a great science fai.
Spin the anemometer (j) and you will see the wind speed and wind gust change. Aside from depictions of various gods, animal themes are common for wind vanes, even today. Vertical axis wind turbine v1.0. Use a modelling clay to hold a straw in vertical position as shown in the image. 1, take a cardboard piece as base and glue a sheet of paper.
How To Make A Wind Vane Howcast from www.howcast.com Next, place your ruler perpendicular to the line at the halfway mark and trace a 5 cm (2.0 in) line to make an upside down t. This makeshift wind vane came to be known as a telltale and is still used today by sailors. Some wind vanes have directions marked on the rod of the vane, which helps the interpreter determine the direction from which the wind is blowing. Measure in 1/2″ and make a mark with a pencil or pen. You simply have to pierce a hole in the paper cup and place the pencil in it. Take a pin and make hole inside the paper roll from centre. These are just some basic things about the wind. Make each slit about 1 cm (or 1/2 inch) long.
Use a modelling clay to hold a straw in vertical position as shown in the image.
Add tip ask question comment download. Afterward cut out a rectangle from the container lid. The use of animal characters usually had a connection to religious beliefs. Aside from depictions of various gods, animal themes are common for wind vanes, even today. Make each slit about 1 cm (or 1/2 inch) long. To make the tail, cut a rectangle that is 4.5 cm tall and 7 cm long. Some wind vanes have directions marked on the rod of the vane, which helps the interpreter determine the direction from which the wind is blowing. Anemometer is a common instrument to measure the speed of airflow. Use a jig or coping saw to cut out the shape, and sand the edges smooth. You simply have to pierce a hole in the paper cup and place the pencil in it. Then sand the entire edge of the figure a little with sandpaper. Measure in 1/2″ and make a mark with a pencil or pen. Cut 2 little slits in each side of the.
You simply have to pierce a hole in the paper cup and place the pencil in it how to make a wind vane. Breath on the outdoor temperature and humidity gauge and you will see the outdoor temperature and humidity change on the display.
